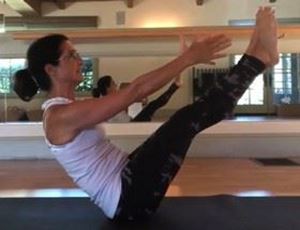
This Pilates course teaches you the Contrology sequence of core based exercises by Joseph Pilates. He created 34 exercises to go through a sequence that he believed to be logical and appropriate, the idea being to first warm up the body, and then progress to the more challenging exercises once the body is sufficiently warmed up and ready. His traditional sequence appropriately warms up the body, challenges and cools it down. His order strengthens and stretches the torso, arms and legs in all planes of movement. His sequence will challenge you in the appropriate progression with and then against gravity: lying down, sitting up, kneeling, standing.
The core, consisting of the muscles of the abdomen, low back, and hips, is often called the "powerhouse" and is thought to be the key to a person's stability. The Pilates' system allows for different exercises to be modified in range of difficulty from beginner to advanced. Intensity can be increased over time as the body adapts itself to the exercises. Lots of modifications are offered in this course.
Lessons will include the traditional Pilates breathing technique to help take you through each exercise. Each lesson breaks down the classical exercies from beginner with modifiations to more adanced and the full classical style. We warmup before we work on the exercise with The Hundred and other warmup exercises.
The Pilates breath is a lateral thoracic breath (which means breathing sideways) inhaling through the nose and exhaling on the exertion through the mouth. It's not forced but is a powerful breath.
Also discussed is the difference between neutral spine and imprinted spine and engaging the abdominals to complete the exercises.
Joseph Pilates quote: "Before any real benefit can be derived from physical exercise, one must learn how to breathe correctly. Our very life depends on it."
One of the most famous of Joseph Pilates' quotes is this: "In 10 sessions you'll feel the difference, in 20 sessions you'll see the difference, and in 30 sessions you'll have a whole new body"
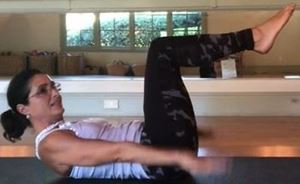
Step by Step Instructions:
- Lie on your back with your knees bent and up in the air, your knees and hips forming 90-degree angles also called table top position. Your back should be in Neutral Spine (Lesson 2). If this position feels like a strain on your lower back, try keeping your feet down on the floor for now. There will be 3 modifications in this lesson plus the full position so choose what works for you - a) Feet on floor; b) Tabletop position; c) Legs straight up in air; or full position which is straight legs at about 45 degrees/
- Inhale as you reach your arms straight up to the sky. Your palms should be facing forward. Exhale as you reach your arms back down hovering off the floor and lift your head, neck and shoulders off the mat. Think of squeezing an upple under your chin. With straight arms, start to beat arms in the arm like slapping water in a bathtub about 3” up and 3” down is the range. Inhale deeply for 5 beats (keep the rhythm with your arms), using accordion breathing with spine imprinted (Lesson 1). Exhale: Using percussive breathing, exhale for 5 beats (saying shh, shh, shh, shh, shh). Hold the position and continue pulsing your arms for 10 breaths. Remember that 10 breaths is 100 total beats (5 for each inhale and 5 for each exhale).
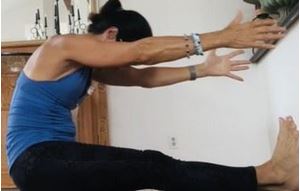
Step-by-Step Instructions:
- Lie on your back on the floor with your legs straight. Draw your belly into the spine as you imprint your spine and make sure your shoulders are relaxed and away from your ears.
- Take an inhale with your ribs down, bring your arms straight up over your head and back so that your fingertips are pointing to the wall behind you. As your arms pass your ears, let the chin draw in and the head and upper spine join the motion to curl up.
- Exhale as you continue in one smooth motion to curl your body in an "up and over" motion toward your toes as if you are trying to clear a beach ball on your legs creating the Pilates C-curve shape. Another analogy is to think of a fence and you need to clear the fence so keep arms in line with your ears. Reach for your toes or as far as your hamstrings allow,keeping the head tucked, the abdominals deep, and the back rounded. Ideally, the legs are kept straight throughout this exercise with energy reaching out through the heels. However, a modification would be to allow the legs to bend, especially as you come up and reach toward the toes.
- Inhale at the end, then exhale as you begin to unwind vertebra by vertebra down to the floor. Be sure to keep the legs on the floor and don't let them fly up as you roll down. Check that your shoulders are relaxed and not creeping up. Continue to set one vertebra after another down on the floor like a string of pearls. Keep your upper body curve as you roll down slowly with control. The arms are still outstretched and following the natural motion of the shoulders as you roll down. Once your shoulders come to the floor, the arms go with the head as you continue to roll down to the mat. Do up to 6 repetitions.
The roll up is one continuous, controlled and flowing motion. Try to synchronize with the breath. If you do this exercise with full attention, 6 repetitions will be sufficient.
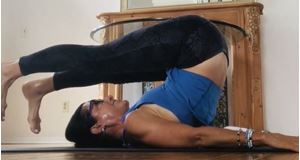
Step-by-Step Instructions
Lie on your back on a mat with your arms along your sides, palms down. Your neck is long with lots of space between your shoulders and ears, and your chest is open.
- Inhale to prepare as you extend your legs straight up toward the ceiling keeping them together with ankles and knees touching and toes.
- Exhale as you reach your legs up and over your head parallel to the ground. Keep your hands pressed down using your arms and not just hands.
- Inhale as you take your legs hip width apart and exhale as you slowly lower your legs back to starting position, placing one vertebra at a time onto the mat and using your arms and hands as brakes. Come down slow with control.
- Do 2 more times opening legs hip width apart and then do final 3 taking your legs over apart and then squeezing legs together as you roll down for a total of 6 times.
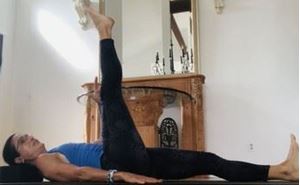
Step-by-Step Instructions
- Engage your core by pulling your abdominal muscles and and imprinting your spine into the mat and anchoring the pelvis and shoulders. Draw one knee in towards the chest and then extend it straight toward the ceiling. Put an imaginary glass of water on your belly and don’t let it tip over. Just the leg moves. You want to minimize the movement in the body and other leg. If you are still rocky, put opposite foot on the floor to stabilize your pelvis. This exercise isn't about how large the circle is but how still you can keep your hips and torso.
- Inhale and cross the extended leg up and over the body counter clockwise. It angles up toward the opposite shoulder and over the outstretched leg.. The exhale will take it up to the top. Breath: inhale first half of circle and exhale on second half of circle.
- Do five to eight circles in this direction, then reverse, starting your circle by exhaling and then reaching your extended leg out to the side and then circling back toward and over the body.
- Repeat on the opposite leg.
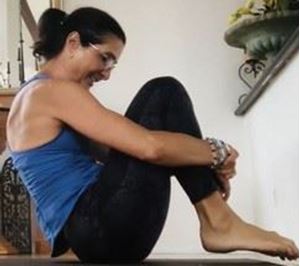
Step-by-Step Instructions
- Sit on your mat and clasp your hands over your shins, just above the ankle. If you can, cross one hand over the other and grab opposite ankle.
- Drop your shoulders, widen your back, deepen your abdominals and make a nice curve of your spine. Tuck your chin in slightly and keep your eyes on your navel.
- Lift your feet off the mat and balance on—or just behind—your sit bones.
- Inhale: Pull the lower abs in and up to get yourself going and roll back on your inhale. Roll only to the shoulder blades. Do not roll onto the neck.
- Pause and then exhale to take you back to the top without feet touching the mat as you return to upright keeping abs deeply scooped maintaining that ball position.
- Repeat five to six times.
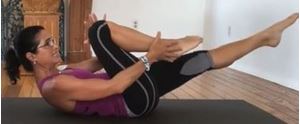
Step-by-Step Instructions
- Start on your back with your knees bent and your shins parallel to the floor. This is the tabletop position for the legs.
- Pull your abs in as you exhale, taking your belly button down toward your spine as you curl your head and shoulders up to the tips of the shoulder blades. As you curl up, extend your left leg at a 45-degree angle. The right leg remains in tabletop position with the right hand grasping the right ankle and the left hand moving inside of the right knee. This will keep the legs tracking straight out from your hips. You will maintain your upper-body curve throughout the exercise. Be sure to keep your shoulders relaxed and your abdominals deeply scooped.
- Switch legs and bring air in as the left knee comes in. Now the left hand is at the left ankle and the right hand at the left knee. Inhale on one leg and exhale on the second leg.
- The hand-to-leg coordination continues with the outside hand of the bent leg going to the ankle and the other hand moving to the inside of the knee. Really extend the leg straight like you are reaching your pointed toes towards an imaginary door bell. Keep lengthening and strengthening.
- Repeat, switching legs up to 10 times.
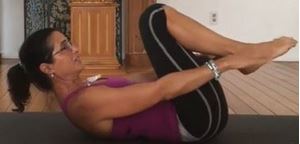
Step-by-Step Instructions
To start, lie on your back with your shins in tabletop position, parallel to the floor, and your palms down. Inhale to prepare.
- Pull your abdominal muscles in to curve your upper body up off the floor as you exhale. Deepen the abs, bringing your forehead toward your knees. Grasp your shins or ankles. Your pelvis is neutral, with your lower back slightly off the ground.
- Inhale as you reach your arms over your head and keep your legs long as you inhale. Keep your shoulders away from your ears and your abs pulled in as you reach your arms and legs in opposite directions. Extend as far as possible while keeping your abs pulled in and your lower back on the mat. Your upper body should stay lifted as you reach. If your back is arching and you feel your back tense, go higher with your legs. I will review modifications in the video.
- Sweep your arms out to the sides as you exhale, drawing a circle to your ankles. Deepen your abs and pull your legs in to center. Do not drop your upper body curve. If you neck gets tired, use a block under your head or head to mat to modify.
- Repeat 6 to 10 times.
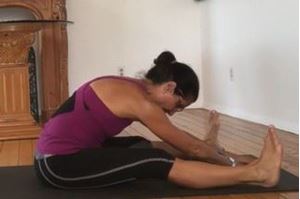
Step-by-Step Instructions
Sit up tall with your best posture. Imagine your shoulders are directly over your sit bones so that you are neither leaning forward nor back. Pretend you are pressed against an imaginary wall behind you.
- Your legs are extended about shoulder width apart, and your feet are flexed. Lengthen the back of your neck and reach the top of your head to the sky. Your shoulders should stay relaxed while your waist draws inward and upward. Place both hands on top of one another on the mat in front of you.
- Inhale to prepare and exhale as you slide your hands along the mat in front of you peeling off the imaginary wall. Lengthen your spine into a large C-shape curve forward. Work to keep the legs taut and straight as you deepen the stretch. The backs of the knees work down into the mat underneath you. The tops of the thighs contract to add to the straightening motion. You can bend your knees to modify.
- From the lowest, deepest point in the exercise (probably your hamstrings will stop you) do 3 pulses forward. Then reverse the action and begin to roll up one vertebra at a time. This is known as spinal articulation and should be done smoothly. Sequence this roll-up action by starting to round up through the lower back, then the middle back, and then the upper back as you stack your vertebrae back up that imaginary wall. Finally, the head comes fully upright. For the entire duration of this rolling up motion, the abdominals are engaged and actively drawing both in and up.
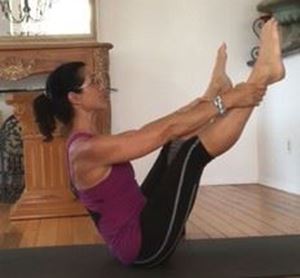
Step-by-Step Instructions
- Begin with Spine Stretch position so you can flow into Open Leg Rocker.
- Bend your knees and pull in your abs. Reach to grasp your ankles. If that is difficult, you can also hold onto your calves or bend the knees and hold behind the knees.
- Lift and extend one leg, balancing between your sit bones and tailbone, keep your abdominals activated (knees can be bent per modifications in video.)
- Lift and extend the other leg. Your legs should be shoulder-distance apart. Draw in the abdominals as much as you can to maintain balance.
- Inhale and roll back using a deepening scoop of abdominals and the fullness of your inhale to propel your roll back onto your upper back/shoulders. Don't roll too far back onto your neck or head. Stay in your C-curve as you roll, leaving your head and neck off the mat.
- Pause.
- Exhale and return. Remain in your C-curve and use your abdominal muscles, along with a strong exhale, to bring yourself back to an upright position. Hold here and balance as you flatten your back. Then round to roll back.
- Repeat, rolling back and returning while inhaling and exhaling as described for 3 - 5 times.
This exercise provides an opportunity to practice using sequential control between the upper and lower abdominals. You will need to keep your abdominals engaged in a deep scoop for the Open Leg Rocker and use the breath to keep this rolling exercise flowing and controlled.
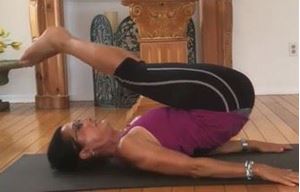
Step-by-Step Instructions
- Lie on your back with your shoulders away from your ears and arms along your sides, palms down. Extend your legs up to the ceiling. Keep them together, hugging the midline of the body and back in a neutral spine. This is the position we start with in the rollover.
- Inhale to prepare and exhale as you lift your legs over parallel to the floor like the rollover. Pause and take an inhale and on the exhale and using abdominal control, pivot legs to right and draw a circle – more like a half circle. Then inhale to prepare and exhale lift legs right through center into the rollover position and now pivot legs to left and draw a circle keeping your belly scooped in. The legs stay together. The modification is to just do circles with your hips down – one way and then reverse. You don’t have to go to the advanced if it’s too much. Your upper body will remain calm and stable. Make sure to press the backs of the arms and palms on the mat.
- Continue until you have done three to each side.
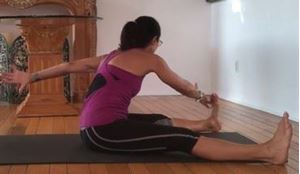
Step-by-Step Instructions
1. Sit up straight on your sit bones. Send energy down through the mat and up through the top of your head. Imagine a string from the top of your head to the sky.
2. Extend your legs in front of you, feet flexed about shoulder width apart. Stretch your arms long out to the side, even with your shoulders, palms facing down.
3. Inhale and twist to the right. Get taller as you turn your whole torso, but use your abs to keep your hips steady and even with each other. As you turn, keep your pelvis steady and make sure your torso does not lean. Challenge is to keep the opposite sit bone down and glued to the mat.
4. Exhale: Let your gaze follow your back hand into the turn, spiraling your upper torso so that you are almost curling into yourself. Imagine you are wringing the stale air out of your body as you twist. This takes a lot of support from your abs, and the action will lift your back arm further.
5. Allow the stretch to take you forward as you reach the pinky finger of your front hand across the outside of the opposite foot to touch your little toe (if you can) or just towards the baby toe. Do not tilt forward in an effort to reach the foot. Twist as far as you can, but always keep your sit bones against the mat. You are ‘sawing’ your baby toe off with your baby finger. You exhale 3 times as you reach a little further on each exhale.
6. Once your reach extends to its furthest point, maintain your turned position as you inhale and return to sitting.
7. Exhale and undo your turn, coming back to the starting position.
8. Repeat this exercise 3 times on each side.

Step-by-Step Instructions
- Lie on the mat face down. Keep your arms close to your body as you bend your elbows to bring your hands under your shoulders which should be away from the ears. The legs are usually together, but it is acceptable to do this exercise with the legs hip-width apart.
- Engage your abdominal muscles by lifting your belly button up away from the mat. The abdominals remain lifted throughout the exercise.
- Warm-up / Modified: Inhale and lengthen your spine, sending energy through the top of your head as you press your hands into the mat to support a long upward arc of the upper body. The elbows are close to the body, the head stays in line with the spine, and the hips stay on the mat. Protect your lower back by sending your tail bone down toward the mat.
- Exhale: Keep your abdominals lifted as you release the arc, lengthening your spine as your torso returns to the mat in a sequential way: low-belly, mid-belly, low-ribs and so on.
- Repeat swan 3 to 5 times using an even, flowing breath to support the movement. To do the full swan dive, arms reach straight forward.
- Finish by pushing back into a child's pose rest position with knees bent and body rounded over the thighs.
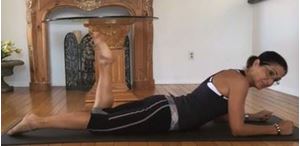
Step-by-Step Instructions
1. Prop yourself on your forearms with your arms parallel to each other fists pressing into your mat.
2. Pull your chest forward and your shoulders back. Lift your stomach off the mat as you draw your navel to spine. Reach your tailbone towards your heels to help your lower abdominals connect to the mat.
3. Without letting go of anything kick your right heel to your seat two times flexed or pointed. Then press your leg down hovering off the ground and switch. Repeat 3-5x each side. Don't let your shoulders ride up by your ears or slump down. Think of good posture throughout the exercise.
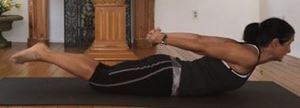
Step-by-Step Instructions
1. Start on your tummy with your legs together on the mat.
2. Interlace your hands together behind your back with palms up, placing them in the small of the back. Let your elbows fall to or towards the floor. Turn your head to right with left cheek on mat.
3. Inhale and keeping your legs together and cheek on mat, kick your heels toward your glutes in a three-part pulse-kick (each pulse is part of the exhale). To kick, emphasize using your hamstrings to pull your heels as close as you can to your sit bones and keep hips down.
4. Inhale: Keep your hands clasped and extend your arms behind you, as you life your head and look forward and rolling shoulders down and back while lifting your upper body high off the mat. At the same time, stretch your legs out straight, just above the mat or with feet on the mat. Protect your lower back by keeping your spine long and pubic bone anchored into the mat. This part of the move is an excellent stretch for the chest and shoulders. Exhale and return to the starting position with your head and cheek turned to the opposite side.
5. Repeat: Do this exercise twice on each side.
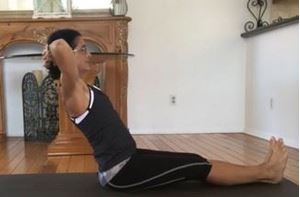
Step-by-Step Instructions
- Begin on your back with your hands behind your head. Let the back of your lower ribs release toward the floor. Legs are together and feet are flexed.
- Inhale to prepare and on the exhale pull your abs in deeply and gently tuck your chin, and imagine pulling your ribs together as you engage your abs to come up. Do not pull on your neck. Think of your head reaching through your shoulders and leading the movement. Your legs are engaged and so is your whole powerhouse. Press the backs of your legs down to the mat with energy through the heels.
- As you roll up, arc over your legs and continuing the exhale to take your curved spine and lifted abs all the way over your legs into a forward fold with the crown of the head touching the legs or towards the legs, depending on your hamstring flexibility. Make sure your chest has stayed open and your elbows are back.
- Inhale and bring your pelvis back to upright as you stack your spine from the bottom up until you are sitting straight up on your sit bones with your head floating easily on top. Shoulders should stay down away from your ears the whole time.
- Inhale and then exhale with a flat back lean back for a few inches and then draw your chin to your chest and roll your spine down to the floor. Keep your low abs engaged and continue lengthening your spine as you slowly unfurl along the mat.
- Inhale and repeat the exercise 3 more times. This is a very challenging exercise. Do the rollup instead if too advanced.
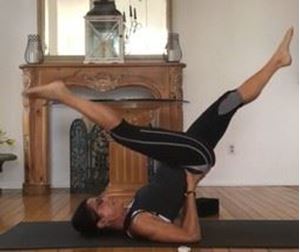
Step-by-Step Instructions
- With legs straight to the ceiling and hands by your sides, roll over like the rollover exercise. Bend your elbows directly and put hands above your hips like a shoulderstand position. Then bend the knees and send your hips over the hands.
- Extend your hips and your legs so that you are on a long diagonal. The legs are together. Hold yourself upright with your abdominal and back muscles. Ideally, you will not have a lot of weight on your hands. Shoulders are wide, away from the ears, and the neck is long and relaxed. The weight is on shoulders and upper back and not the neck.
- Scissor your legs open, equally away from each other. The tendency is to bring the leg towards your face too close, and not extending the leg that is moving away toward the floor. Focus is on the leg moving away from you. The pelvis stays absolutely stable.
- Repeat the scissor action 6 times.
- To come out of the exercise, bring your legs together overhead and roll down with control, as you would come out of the rollover.
Step-by-Step Instructions
- With legs straight to the ceiling and hands by your sides, roll over like the rollover exercise. Bend your elbows directly and put hands above your hips like a shoulderstand position. Then bend the knees and send your hips over the hands. This is the same form as Scissors.
- Extend your hips and your legs so that you are on a long diagonal. The legs are together. Hold yourself upright with your abdominal and back muscles. Ideally, you will not have a lot of weight on your hands.
- Lie on your back and roll your hips up into shoulder stand position. Make sure that you are not too far up on your neck. Shoulders are wide, away from the ears, and the neck is long and relaxed.
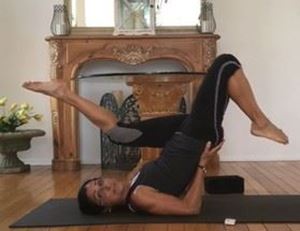
- Bend the right knee and extend the right leg toward the wall behind you. At the same time, bring the straight left leg over your head, to almost parallel to the floor.
- As each leg moves into its fullest extension, the left leg bends to come through toward the back wall, and the right leg makes a long arc up and overhead. Basically, this is like pedaling in reverse.
- Do up to 10 sets in both directions. Then bring the legs together and use abdominal control to roll back down like the Rollover and Scissors. The focus, like Scissors, is extending the leg that moves away from you.
Step-by-Step Instructions
1. Begin lying on your back with your legs bent and hip-width apart. Arms should be by your side with palms down.
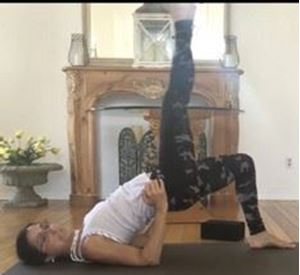
2. Inhale to prepare and exhale to lift your pelvis and hips, creating a diagonal line from knee to shoulder.
3. Extend one leg straight up to the sky. Flex the foot and bring that knee to meet the other knee and then point back straight up to the sky. Flex and point 5 times with this leg raise. Don’t go lower than the knee of the leg that’s still. Keep the body still during the leg raises.
4. Bend your extended knee and then return to the starting bridge position with both feet on the floor. Repeat the exercise with the other leg. Place that foot on the floor and then articulate your spine back to the mat.
Step-by-Step Instructions
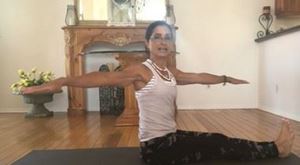
Start by sitting up tall on your sit bones. Pull your abdominals in so that your upper body is well supported. Flex your feet and reach your heels. Extend your arms directly out to the sides, keeping them even with your shoulders, so that there is one long line from fingertip to fingertip. Pretend you are sitting in a concrete block and can't move the lower body.
Think of your spine as being very long, with energy moving down into the floor through the tailbone and up to the sky through the top of your head. Even with all that height, you still want to keep your shoulders relaxed and your rib cage down. Think of a string reaching to the sky and every time you twist, you get more length in your spine through the crown of the head This is one of the many exercises where you keep one part of your body still (lower body in this case) and upper body moves. This is the control you need to activate from your core.
- Inhale to prepare and exhale as you turn your torso and head on that central axis, getting taller as you twist. The movement is a two-part pulse where you exhale to twist halfway and then exhale again to turn as far as you can so it's 2 short exhales in 2 short movements.
- Inhale and return to center. As you return, continue to extend energy out your fingertips, through your heels, and out the top of your head. Control the motion and make sure that your pelvis does not move. Check with your legs and feet and make sure they are not moving side to side and legs and feet tight together.
- Exhale and take the twist to the other side. Repeat five times on each side.
Step-by-Step Instructions
Start on your back with your arms along your sides, palms down. Lightly press the backs of your arms to the mat and open your chest. Your ribs stay down.
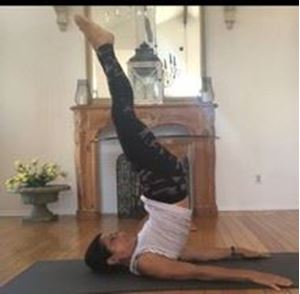
- Imprint your spine into the mat. Inhale to prepare and exhale to bring the legs into the Rollover position. Use a deepening scoop of your abdominal muscles and some help from the pressure of your arms and hands to bring your legs over your head, parallel to the floor. Your back is curved so that the weight is on your shoulders and not on your neck.
- Inhale to prepare and exhale to sweep the legs up to the sky as straight as you can. Keep your chest open and the backs of your arms pressing down as you lift your legs up so that you are as close as you can get to perpendicular to the floor. When you look up you will see the feet and not your legs. You are on your shoulders, not your neck, getting help from the pressure of your shoulders and arms on the mat. This is a strong powerhouse move requiring hip extension with upper body flexion. Think up and and shoot up through the midline of your body.
- Inhale to prepare and exhale to roll down with legs straight up as much as possible, vertebra by vertebra, until you are back to the start position.
- Repeat the exercise 2 more times.
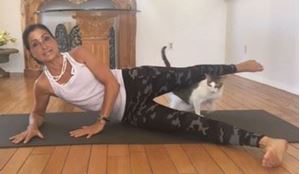
Step by Step Instructions:
- Lie on your side and line up your ears, shoulders, hips, knees and ankles. Now lift the legs and send them forward in a pike position / banana shape. From about your knee down is off the mat so feet are forward of your hips This will help your balance and protect your lower back.
- Your bottom forearm is on the floor and the front hand rests firmly, palm down, on the mat in front of your chest. Use this hand to help stabilize. You can also prop your head on your hand, making sure to lift the ribs away from the mat so that your back and neck stay in alignment. You can modify this position by reaching your bottom arm straight out along the mat above your head and resting your head on your arm as a pillow. Choose any of the 3 options most comfortable. Think of an imaginary glass of water on the top shoulder. If you move your upper body, the glass will fall.
- Lift the top leg to hip height. Flex the foot and send energy out through the heel.
- With the foot flexed, swing the top leg to the front. At the full length of your kick, do a small 2 pulse kick forward.
- Keeping length in your leg and through the whole body, point your toe and sweep the top leg to the back without any pulse. Important: Only reach as far back as you can go without crunching the low back or moving the pelvis. A big part of the challenge of the exercise is to use the core muscles to keep the entire trunk of the body stable with just the leg moving. If you upper body is swinging with the leg, shorten the range of the leg.
- Repeat this exercise 5 to 10 times.
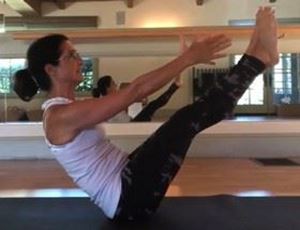
Step-by-Step Instructions
Begin lying down, arms along your sides. Bring your legs to a tabletop position (lower legs parallel to the floor. You can also start with legs outstretched to 45 degrees for a more advanced version but you need to be very strong to do this.
- Inhale to prepare and exhale lengthen your spine to nod your head slightly and begin scooping your abdominal muscles in and up so that your upper body begins to roll off the mat. Simultaneously your arms are coming up to parallel your legs as your legs extend straight from the tabletop position. You can modify by keeping tabletop position or go into the full V position. Fingertips reach towards or past the toes but the shoulders stay down. This is a scooping move. The energy moves up the front and down the back with a feeling of support length along the backs of your legs. It's very difficult to keep legs straight so modify with bent knees, if needed.
- Inhale as you come to the top and open your chest, lifting your head slightly to express the length of your spine.
- Exhale to roll down. Start from the low abs and use control, rolling down sequentially along the spine. Keep the legs together. Think of rolling down your midline. Keeping your legs straight will be a challenge or as the lower back touches the mat, bring the knees into the chest which will be easier on your back.
- Repeat 3 times. Lots of modifications in video.
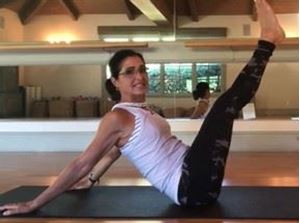
Step-by-Step Instructions
Hip Twist follows Teaser so moving from Teaser to Hip Twist can be very challenging. We will start from a more modified position as follows:
- Begin in an upright seated position with your leg straight in front of you.
- Broaden your collarbones and reach your arms behind you with fingers facing away from you. They will be supporting you through this exercise. If you feel like your shoulders are too tight to stay in an open position, lower down onto your forearms.
- Inhale to lift one leg up to tabletop.
- Exhale to lift the other leg. Straighten both legs to the sky bringing them as close toward your body as you can.
- Inhale to prepare and exhale to begin circling your legs in a clockwise motion. Make sure to keep your legs parallel and together throughout this exercise. As your legs lower, resist the temptation to allow your pelvis to rotate. Inhale to finish the circle and return to your starting position.
- Inhale at the top of the circle and exhale to circle your legs counterclockwise. Again, make sure that you legs stay together and parallel. Inhale to finish the circle and return to your starting position. Breath: inhale first half of the circle and exhale second half of circle to the top.
Make sure to continue alternating the direction of your circle as you complete 2-4 more. Modified would be bent knees or on your back.

Step-by-Step Instructions
- Lie on your stomach with the legs straight and together.
- Stretch your arms straight overhead, keeping your shoulder blades settled in your back and your shoulders away from your ears.
- Pull your abs in so that you lift your belly button away from the floor.
- Extend your arms and legs so far in opposite directions that they naturally come up off the floor. At the same time, lengthen your spine so that your head moves up off the mat as an extension of the reach of your spine. You are looking straight ahead and slightly down.
- Pump your right arm and left leg up and down in a small pulse, continuing to reach out from your center. Alternate right arm/left leg and left arm/right leg pulses. It’s not about how high they are but how long.
- Breathe in for a count of 5 kicks and reaches, and out for a count of 5. This should feel like swimming in a pool.
- Repeat for 2 or 3 cycles of 5 inhales and 5 exhales.
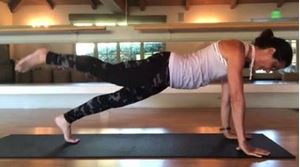
Step-by-Step Instructions
Begin leg pull front in the plank position: Start on your knees. Place your hands on the floor in front of you, fingers pointing straight ahead. Keep your arms straight and your elbows unlocked.
Engage your abdominals and lengthen your spine, extending through the top of the head as you lean forward to put your weight on your hands. Your shoulders should be directly over your wrists and settled in your back. That means there is a lot of space between your shoulders and your ears.
With your abdominals lifted, extend your legs back so that they are straight and together. Your toes are curled under so that some weight is on the balls of your feet. Your ears, shoulders, hips, and heels should be in one long line.
- Extend one leg from the hip so that your foot lifts off the mat a few inches. Your foot can point softly as it is released from the mat and do 2 pulses. As you extend your leg, your hip will lift slightly, but the challenge is to keep the rest of your body stable in plank position. This requires extra work from your abdominals, shoulders, and back.
- Return your foot to the mat and extend the other leg.
- Repeat the lift with 2 pulse five to seven times on each side.
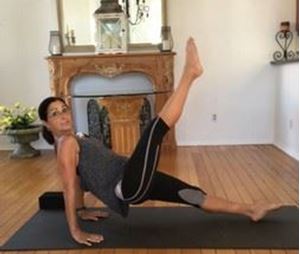
Step-by-Step Instructions
- Sit tall with your legs together, extended straight in front of you. Your abdominal muscles pull in and up as your spine lengthens. Relax your shoulders.
- Keep your chest open, and your shoulders rotating back and down as you pull the heels of your hands directly back until you can place your hands flat on the floor with fingertips pointing front. You may be leaning back slightly. Now inhale to prepare.
- Exhale to engage your hamstrings and lift your pelvis to create a long line, ankle to ear. Your abs should be stabilizing your trunk and pelvis. Push down through the backs of your arms to help keep your chest open and get more support from your back. Inhale at the top. To modify, move into tabletop with feet flat and knees bent.
- On an exhale, deepen the crease at your hip to lift your right leg toward the ceiling. Hold the rest of your body completely still. Don't let lifting your leg pull your pelvis out of alignment. Your hip doesn't go with the move, nor does your butt drop.
- Inhale to return the leg to the floor. Use control—don't just drop your leg—lengthen it as it goes down and keeps the rest of your body stable.
- Exhale: lift your left leg. You can take a break before lifting the left leg if you need to. Lower yourself with control and keep your shoulders down. Start over, lifting the left leg.
- Inhale to return the left leg to the floor. Exhale to hold.
- Inhale to fold just at the hip joint, placing your pelvis back on the floor. Keep your shoulders down as you do.
- Do three sets. You can do them all on one leg or alternate one on each leg.
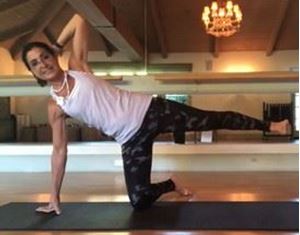
Step-by-Step Instructions
This exercise is like Side Kick but in a modified side plank position.
Start with both knees on the ground and torso upright. Extend one leg out to the side with toes facing forward and place one palm on the mat with fingers pointing away from the knee. Place the other hand behind the head, with the elbow bent and pointing toward the ceiling. Lift the extended leg to hip height.
- Inhale twice as you bring the raised leg forward with flexed foot as you pulse 2 times (just like the Leg Kick) moving ONLY at the hip.
- Exhale once as you bring the raised leg backward pointing the toes moving ONLY at the hip. Leg stays in line with the torso the whole time and doesn't drop lower than the hip. Repeat the sequence five times. Do the same on the opposite leg.
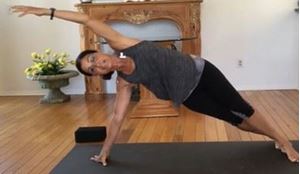
Step-by-Step Instructions
- Sitting on one hip with your hand slightly in front of your shoulder fingers pointing away from you and hand in line with your feet. Feet are out to the side in a mermaid position. Your knees start out bent slightly. If you were to look at your hand and feet they will be in one straight line while your seat and your knees are on either side of that line.
- Pulling your shoulders down your back and pressing your bottom hip up stand on your hand and feet and lift your hips up into a side plank. Sweep the top arm up and over extending it all the way straight. Lift the bottom waist creating a rainbow shape as you breathe into the side body stretch. Hold at the top with an inhale and then exhale with control lower back to the mat. Once the calf touches the mat and before your hip touches the ground, inhale and then exhale lift back up. Repeat 2 more times.
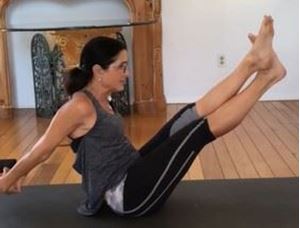
Step-by-Step Instructions
- Sit tall on your sit bones with your legs outstretched and right ankle on top of left. Seal your legs together and feel the sense of midline moving from your legs up your spine and through the top of your head. Maintaining that feeling as you move will help you keep the boomerang shape and give you a line of energy to move along.
- Place your hands on the mat by your side. Inhale to prepare and exhale as you deepen your C-Curve and roll back, taking your crossed legs overhead as you would in the rollover exercise. Your body has taken a boomerang shape and will keep that shape through the exercise. You are in the Rollover position with legs parallel to the floor and the backs of your arms and hands press against the mat, adding stability. Inhale as you uncross your legs and re-cross with the other leg on top.
- Exhale as you roll up into Teaser position. Keep your Teaser shape and inhale and lift your arms up to the sky and do a circle with your arms as you sweep them to the back. Keep your arms high as you interlace your hands behind your back, Exhale with control of the shape as you smoothly let your legs come down to the floor as you lift your arms as high off the back as you can. Once you touch down with your legs, sweep your arms wide to the sides and around your feet into a forward bend with one foot still crossed on top.
- Unwind to a flat back with your hands back to the mat along your sides and ankles crossed back to starting position.
- Repeat 5 more times switching the crossed ankles each time.
Step-by-Step Instructions
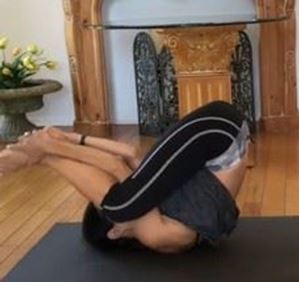
1. Sit up at the front of your mat. Draw your feet in towards your center.
2. Dive your hands through your legs and take hold of the outsides of your ankles.
3. Rock back just enough that your feet come off the mat and find your balance. Your feet remain close together but your knees are shoulder-width apart. Get your balance here.
4. Draw your abdominals in strongly and round your lower back, but don't hang back off your arms. Pull your legs and feet close to you to get ready to roll.
5. Scoop your abs and make a C-curve shape with your torso. Your gaze is down towards your feet. Your feet should be two inches off the mat. To begin, clap your feet together 3 times.
6. Inhale: Initiating the movement with your lower abs, smoothly roll back onto your shoulders (not your neck). Clap your feet together again 3 times at the top.
7. Exhale: Use your deep abdominal muscles and your exhale to help you roll back up. Aim your feet towards the mat in front of you as you roll forward to your starting position.
8. Repeat 4 to 6 times. Use the clapping of the feet to keep the rhythm of the move both upright and when on your back.
Step-By-Step Instructions
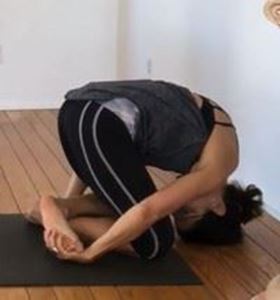
- Sit up straight, bend your knees and cross your legs at the ankles.
- Bring your knees to your shoulders and grasp your crossed feet with your hands. Keep your back and chest wide and shoulders down. Your knees will stay in the frame of your body through the exercise. Don't let them fall way out to the sides.
- Curl into a ball like you would for rolling like a ball: Head down, abs scooped in, tailbone curving up, long curved spine. Exhale to deepen your curl and get ready to roll.
- Inhale to roll back. Initiate and control the movement with a deepening scoop of the abs. Roll only to your shoulders. Do not go to your neck.
- Let go of your feet and switch the cross of the ankles at the top of the movement (while on your back). Grasp your feet again and continue.
- Exhale to roll forward. Stay curled and keep rolling forward up and over your legs.
- Inhale as the crown of your head gently comes to the mat with hips lifted.
- Exhale to roll back. Keep your breath flowing and repeat 6 times.
Step-by-Step Instructions
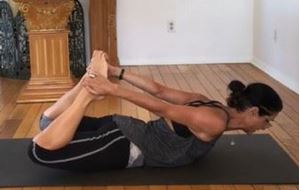
Begin on your belly with your forehead on your mat and your arms along your sides. Take a moment to lengthen your spine and engage your abdominal muscles. Bend one knee and grasp your ankle. Bend the other knee and grasp that ankle. Keep your head down for now. As much as possible, you will keep your legs parallel throughout the exercise. Engage your inner thighs to help you do this.
- Inhale and press your ankles into your hands as you simultaneously lift your head, chest and knees away from the mat. This is a long back extension with your neck extending through your shoulder girdle as your arms reach back, chest open and face forward.
- Start rocking: Hold the crescent shape you have created and keep legs parallel. Exhale to rock forward. Inhale to lift. Stay balanced on your hips; don't lean to one side or the other. The rocking is accomplished mostly with the breath and subtle shifts in the way you use your abdominal and back muscles, much like you do in The Swan Dive.
- Rock back and forth 5 times.
Step-by-Step Instructions
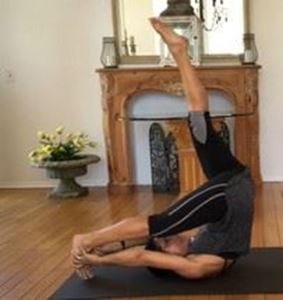
Start Position: Lay flat on back with arms by side, and both legs extended straight up to the ceiling. Roll over and place the balls of the feet into the Mat behind you (like the Rollover). Circle your arms around and place both hands on the right foot. Keep the weight into your shoulders and upper back.
Movement: Extend the left leg straight to the ceiling. Without changing the position of the hips or torso, place the ball of the left foot back into the hand and extend the right leg to the ceiling. Repeat. For more advanced practitioners, legs can switch simultaneously.
Step-by-Step Instructions
- Stand tall with your heels against the back edge of the mat.
- Keep hips over heels as you inhale, pull your navel into your spine and roll your torso down toward mat like you are peeling your spine off an imaginary wall behind you. Place hands on mat slightly more than shoulder width apart.
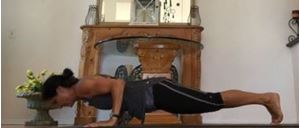
- Exhale as you walk your hands out onto the mat (about 4 hand prints) until your palms are beneath your shoulders and heels over your toes. Your body will be in a Push-up position (or Plank) - a straight line from head to ankles.
- Perform 3 Push-Ups (bend and straighten arms) with elbows close to the sides of the body grazing your ribs. Inhale as you send your hips high like a downward dog and then walk your hands back toward your feet bringing your chest towards your legs. Try to keep your legs straight and don’t rock side to side when you walk back.
- Exhale as you roll your body back up to a standing position. Do 3 sets of 3 Push-Ups.
