Teacher FAQs
Course Structure
This section covers general questions about your video-course such as its composition, different parts, naming conventions, and PDF files with images and explanations you can download. Click on the questions below to expand and view each answer.
Course Composition Details
A Lernsys course is easy to create. Each video-course is composed of the following elements:
Sections (units, modules)
Video-lessons (.mp4 is recommended)
Worksheets or practice exercises (Microsoft Word, Excel, PDF, JPG, PNG)
Worksheet or exercise review video-lessons
Quizzes or tests
Resources (optional)
To see what a complete course looks like, see page 2 of How to Create a Course.pdf or view the video tutorial: How to Create a Course
For more on course contents, please visit: Course Format
Sections which can be named in the course as "Section", "Module", "Unit" are used to group together either unrelated lessons under a general heading, or the main topic containing grouped lessons which discuss either a related or similar topic or different parts of the same topic, such as "Circular Trigonometry" or "Combining Like Terms". For more on this, see Lesson 4: Creating a Section and also Lesson Guidelines.
Video-lessons are the actual lectures where you explain and cover new topics. A course must have a minimum of 30 video-lessons to pass our Course Review Process. Each video lesson should be 10-30 minutes depending on the subject and age group or school grade you are teaching. Each video-lesson can only have one video assigned. If you need to upload more than one video, you will need to add more lessons to your course. You can use a naming convention as instructed below. Most video-lessons teachers upload run between 10 and 20 minutes. Again, this depend on the target audience. For more on this, see Lessons 5 and 6: Creating a Lesson and also Lesson Guidelines.
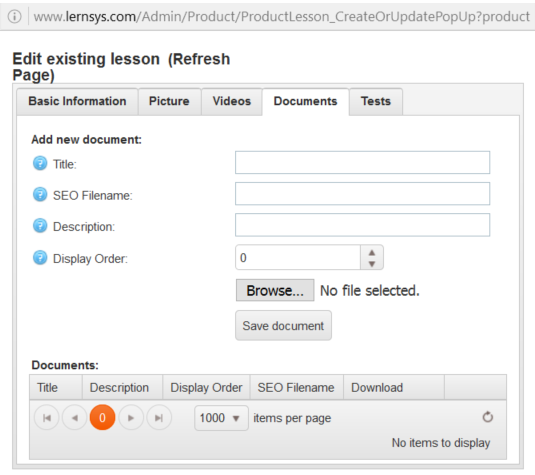
Worksheets or practice/exercise lesson files are simply exercises or practice documents required to ensure the students have understood and assimilated the new material and topics covered. These materials can be uploaded under each lesson's "Documents Section" (see below) as Microsoft Word, Excel, PDF, JPG, or PNG files. The amount of problems a worksheet must contain truly depends on the difficulty of the lesson and how long it will take to resolve each problem. For example, for problems such as multiplying by 2 digits, you can have 10, 15 or 20 problems. More complex problems like Algebraic Word Problems, 4 or 5 problems may be more than enough. For more on this, see Lesson 7: Adding Documents to Lessons and also Lesson Guidelines.
Worksheet or activity review video-lessons are lectures where you review the exercise or worksheet and provide the correct answers for at least one worksheet or exercise document. The review videos must be uploaded as a new "lesson", coming after each of their counterpart video-lectures. (More details on this below). The exercise review video must show how to arrive to the solution step-by-step. This adds great value to the course. You can record yourself solving the problem on a whiteboard or blackboard, use a docu-cam or even record your computer screen. If you have uploaded more than one worksheet for a single lesson, you can provide the answers to the additional worksheets either as an exercise review video or upload the answers to the lesson's "Documents" or the course's Resources section. To clarify, you must provide the answers to at least one worksheet in a video-lesson; for any other worksheets, you have a choice whether to provide the answers in a video-lesson or as a document (JPG, PNG, PDF, Microsoft Word, Excel). Important: Do not just provide the correct answers during the exercise review video. This is not really very helpful if the students get an answer wrong. Students need to understand where they made the mistake(s) and how to solve the problem the correct way step by step. Worksheet review videos should be uploaded as a follow-up or counterpart lesson. For example:
Lesson 1: Adding Fractions
Lesson 1: Adding Fractions Worksheet Review
Or,
Lesson 1: Adding Fractions
Lesson 1 - Part 2: Adding Fractions Worksheet Review
For more on this, see Lessons 5 and 6: Adding Videos to Lessons and also Lesson Guidelines.
Digital quizzes and tests are often added either at the end of each lesson or a group of lessons. This is done to ensure that the students have properly mastered the new concepts. Creating multiple choice quizzes and tests is very easy. Our system will provide you an interactive tool to create quizzes and tests in just a few minutes. The system will take care of correcting the answers and grading too. Quizzes can vary in length. We will leave it up to you to decide how much to ask after each lesson. Quizzes could be as short as 5 to 10 questions and are really meant to ensure the students are paying attention to the entire lesson. In fact, questions can also be very specific pointing to data you just presented, or can be open-ended questions designed to provoke thought or to discuss with the student's parents. You can use later lessons to provide clarity on these open-ended questions and their answers. When creating a test for an entire unit or course section, make sure that the test has an amount of questions representative of the different lessons being tested (usually 15 to 20 questions). Remember to always upload under the "Resources" section the correct answers to all quizzes and tests. For more on this, see Lesson 9: Adding Quizzes to Lessons and also Lesson Guidelines.
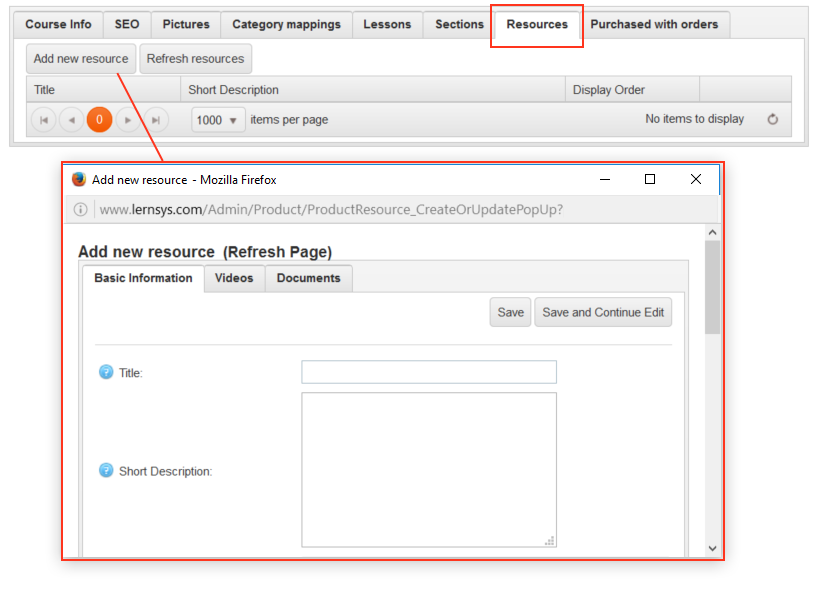
Resources are special materials which only the students’ parents can access via a unique log in they will have access to. These documents are saved in the section called “Resources”. Parents will need to be logged in order to download these materials. Resource materials can include among other documents: answer sheets, test and quiz answers, additional topic materials, practice exercises, or discussion topics for parents to test their children’s newly acquired knowledge or reasoning skills. Additional resources tend to add a lot of value to your course and the final price you can charge for it. For more on this, see Lesson 8: Adding Resource Material to Lessons and also Lesson Guidelines.
Yes. Since each lesson cannot exceed 30 minutes of duration, it is possible that you may require to split a lesson into several parts. You may choose, for example, to have three 20 minute lessons instead of two 30 minute lessons. This may also be indirectly connected with the attention span and concentration of the students and their age group. If you need to split a lesson into parts, this is fine. However, make sure that you are not splitting lessons only for the sake of giving the appearance that the course has a larger quantity of lessons. Since each lesson can only have one video assigned, uou must add a new lesson for each video.
You can use different naming conventions as long as it is clear that the names indicate that the lessons are part of the same lesson. Be sure to understand the distinction between lessons which are parts of the same lesson, and those which are similar but not the same or which cover a slightly different topic. For example, these are similar but different lessons:
Lesson 5: Adding Fractions: Same Denominator
Lesson 6: Adding Fractions: Different Denominator
However, if the lesson is long and you want to split it into two separate lessons, then you may say:
Lesson 6: Adding Fractions: Different Denominator Part I
Lesson 6: Adding Fractions: Different Denominator Part II
Or by appending "Part I, Part II" after lesson number:
Lesson 6 (Part I): Adding Fractions: Different Denominator
Lesson 6 (Part II): Adding Fractions: Different Denominator
Lesson 6 (Part II): Adding Fractions: Different Denominator
Or into 3 separate lessons:
Lesson 3: Fractions, Decimals, Percents Part I
Lesson 3: Fractions, Decimals, Percents, Part II
Lesson 3: Fractions, Decimals, Percents, Part III
In the last 3 examples above, the lessons are covering the same topic. In the very first example above (Lesson 5 and Lesson 6), they are two slightly different topics, "Same Denominator" versus "Different Denominator".
It is strongly recommended that you insert a quiz or test after each lesson, unless the lessons are "partial" lessons as discussed above. Quizzes and tests are meant to ensure the students are not skipping over parts of the video. We will leave it up to you to decide how much to ask after each lesson. Depending on the subject and topic, the quiz could be anywhere between 5 to 10 questions or as short as one question or two. The main purpose is to ensure that the students are paying attention to the entire lesson. In fact, questions can also be very specific pointing to data you just presented or something you just said. Remember that you can also use subsequent lessons to provide clarity on previous quizzes and tests. For more on this, see Lesson 9: How to Create a Course.
Answers for quizzes and tests must be uploaded under the "Resources Section" which is password protected so that only parents can access these. For more on this, see Lesson 8: How to Create a Course and also Lesson Guidelines
The worksheet or practice sheet review video-lessons are the video lectures where you go over and provide the correct answers for at least one worksheet or exercise document. The exercise review video must show how to arrive to the solution step-by-step. This adds tremendous value to the course. You can record yourself solving the problem on a whiteboard or blackboard, use a docu-cam or even record your computer screen. Important: Do not just provide the correct answers during the exercise review video. This is not really very helpful if the students get an answer wrong. Students need to understand where they made the mistake(s) and how to solve the problem the correct way step by step. For more on this, see Lesson Guidelines and Lessons 5 and 6: How to Create a Course
The course title should not be longer than 60 characters including spaces. Lesson titles should be under 70 characters including spaces.
Short course description should be limited to no more than 295 characters.
Yes. There are two ways you can insert special symbols or characters in quizzes or tests. Even if you don't know any HTML at all, you can use HTML code to show special characters or symbols. Just type or copy-paste the equation in the converter box (see link below) and click generate. Then copy-paste the HTML code into the question and answer section within the Lernsys Test Creation Section and the special symbols or characters will render properly. Make sure you are copying actual text and characters into the conversion box and not an image. http://www.unit-conversion.info/texttools/text-to-html/
This quick video tutorial will walk you through the steps of how to use special symbols and characters using the method above: http://www.lernsys.com/en/how-to-insert-special-symbols-and-characters
This quick video tutorial will walk you through the steps of how to use special symbols and characters using the method above: http://www.lernsys.com/en/how-to-insert-special-symbols-and-characters
Alternatively, you can include the special symbols in a "document" that students can download as part of a lesson, just like any other document you are able to upload under the "Documents Section". Using this method, your students will use your document to read the questions and the digital quiz to answer the questions with the system's auto-correct function. For more on uploading documents see Lesson 7: How to Create a Course
For example, in the Word, PDF, Excel, JPG or PNG document that you can upload with the lesson, you can list just the questions:
1) 14 - 19 =
For example, in the Word, PDF, Excel, JPG or PNG document that you can upload with the lesson, you can list just the questions:
1) 14 - 19 =
4
2) Σn
n=1
Then on the actual digital quiz, the question can say:
Answer Question No. 1: A) -33 B) -5 C) 5
Or,
Answer to Question No. 1 is -5: A) True B) False
Answer Question No. 1: A) -33 B) -5 C) 5
Or,
Answer to Question No. 1 is -5: A) True B) False
Answer Question No. 2: What is the value of n? A) 1 B) 1,2,3,4 C) 4 D) none of the above
So again, the problems with any special symbols or characters will appear in the document you upload with the lesson, and the students will use the digital quiz or test to enter their responses. If you leave enough space in the document between the problems, your students can also print out the document and use it to work out the problems on paper.
Documents, including practice exercises, need to be uploaded under the "Documents" section in the respective lesson. For more on this, see lesson 7 in the How to Create a Course video-tutorial: Adding Documents to Lessons
The resources should be uploaded under the "Resources" tab. Click the "Resources" tab and then click on "Add new resource". For more on this, see Lesson 8 in the How to Create a Course video-tutorial: Adding Resources to Lessons
You can use different naming conventions as long as it is clear that the names indicate that the resource document belongs to a particular lesson. For example, these are different formats you can use:
Lesson 1: Adding Fractions: Quiz Answers
Lesson 1: Adding Fractions: Additional Exercises
Lesson 1: Adding Fractions: Additional Exercises
Lesson 1: Additional Exercises
Or,
Lesson 1: Additional Exercises
Or,
Lesson 1: Adding Fractions: Quiz Answers
Lesson 1: Adding Fractions: Additional Exercises
Or,
Lesson 1: Adding Fractions: Quiz Answers
Lesson 2: Subtracting Fractions: Quiz Answers
Lesson 3: Multiplying Fractions: Quiz Answers
Lesson 3: Multiplying Fractions: Quiz Answers
In each example above, it is very clear what the document actually is (quiz answers, additional exercise, etc.), and to which lesson the document belongs.
General Guidelines, Profile Picture, Profile Video
Yes. You can download it here: PDF Tutorial How to Create a Course
Yes. You can download it here: PDF Tutorial How to Create a Lesson
Yes. You can download it here: Lesson Component Details
Yes. You can download the steps here: Re-using a Video
Yes. You can download it here: Course Description Template
Yes. You can download tips, guidelines and best practices here: Teacher Profile Video Guidelines
Yes. You can download tips, guidelines and best practices here: Teacher Profile Picture Guidelines